The problem
A fire protection control valve sometimes needs to be replaced, whether it’s because of a leak, bad seat, mechanical damage, or a stuck or broken handle. When that happens, the repair often needs to happen quickly, because the sprinkler system may be impaired. But how do you ensure the right size of the control valve, especially in situations that call for cutting pipe and figuring out the “take-out” (the distance from the valve’s centerline to the end of the pipe) or the “lay dimension” (the length of the valve that fits between the pipe ends)—especially when a direct replacement valve is no longer available?
Why this matters
The control valves that manage a sprinkler system’s water supply are among the most important pieces of equipment. A fire protection control valve stuck closed shuts off the system, while one stuck open can leave no easy way to isolate the system during a leak or activation. And a leaking or otherwise damaged valve can also be a critical deficiency or system impairment.
This is why NFPA 25 requires operating “each control valve … annually through its full range and returned to its normal position” (2026: 13.3.3.1). In addition, weekly, monthly, or quarterly inspections (depending on if a valve is locked or supervised) must check for the valve’s status and any leaks (13.3.2.1-13.3.2.1.2, 13.3.2.2). If an issue cannot be corrected through adjustment or repair, the valve will need to be replaced—typically quickly.
The fix
Start by determining whether the existing control valve can be replaced with the same model.
An exact replacement gives you the same valve dimensions, connection type, and key performance specs. In flanged or grooved systems, a valve that’s exactly the same size can mean there’s no need to cut and repair pipe.
If the control valve is old and no direct replacement is available, identify the length of a similar replacement valve and measure and cut new pipe as needed.
1. Choose a valve with the same nominal diameter (e.g., a 4-inch valve for 4-inch pipe) and connection type (e.g., grooved for grooved) as the existing system.
2. Confirm the appropriate groove, thread, or flange standard, pressure rating, listing or approval, service compatibility, function, supervisory provisions, and any manufacturer installation restrictions.
3.Find the new valve’s length on the manufacturer cut sheet. This is identified by a lettered dimension, such as “C,” “L,” or another letter:
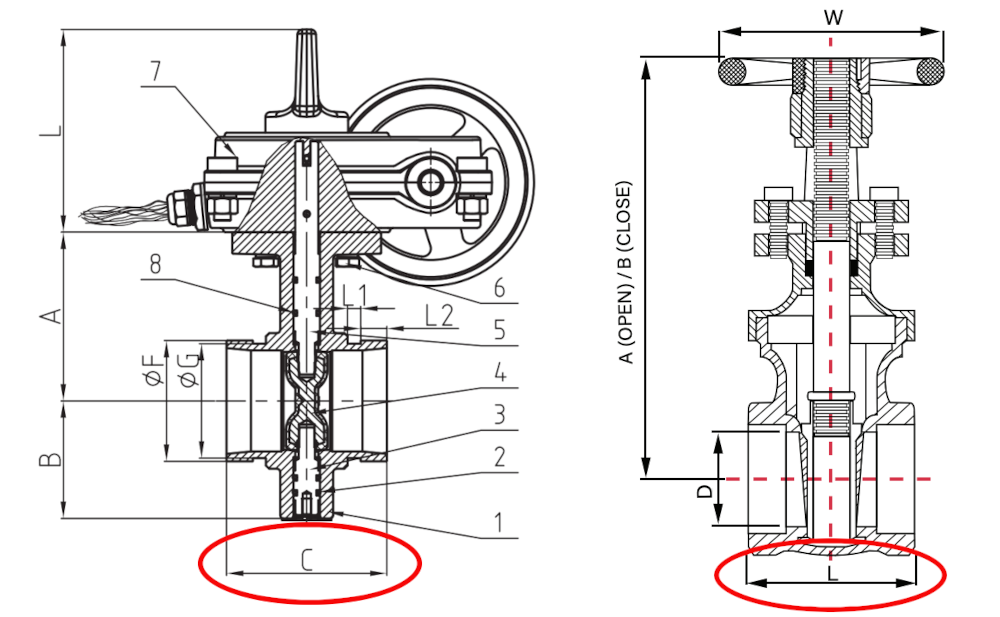
The cut sheet for the 4-inch grooved butterfly valve on the left marks the valve length with a “C” dimension, while the cut sheet for this 1-1/2-inch threaded OS&Y valve on the right labels it as “L.”
4. Then, check the table on the cut sheet to determine the length for the specific valve diameter. In the examples shown above, the 4-inch butterfly valve has a length of 4.57 inches (116 mm), while the 1-1/2-inch OS&Y valve has a length of 3.23 inches (82.04 mm).
5. Cut or adjust pipe as necessary to accommodate the new fire protection control valve.
With these measurements, fire protection pros can do the following:
For grooved or flanged valves, if the replacement valve is the same length as the old valve, replacement can be relatively straightforward: decouple the grooved coupling or flange on one or both sides, remove the old valve, install the new valve, and reconnect the pipe with the flanges or couplings. Pushing the pipe to one side a bit, aka “deflection distance,” may be needed to create enough clearance to attach everything.
If the valve length is different, pros will need to measure and cut a new pipe length to the point where the pipe end or flange contacts the valve or flange. Then, they apply grooved couplings or connect the flanges, after achieving enough deflection distance if necessary.
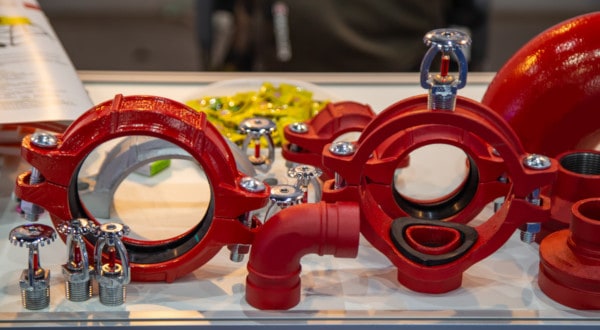
Important note: Some “installation ready” grooved couplings, such as this EZ™ Style coupling from Victaulic, have an internal center leg in the gasket that affects how the adjoining components seat. Manufacturers instruct installers to insert each mating component until it contacts the gasket’s center leg. For example, Victaulic engineering advises accounting for an EZ Style coupling’s internal gasket geometry by adding 0.25 inches to the measured lay length of the pipe. Always follow the specific coupling manufacturer’s instructions.
In contrast, threaded valves, even when replacing an old one with the same model, typically involve more work. This may require cutting the pipe on one or both sides of the control valve to remove it, then cutting and reinstalling new section(s) of pipe to match the exact measurements needed to fill the gap created by removing the old valve. Measure the new replacement pipe length to where it will enter the valve’s female threaded connection.
In addition, the cut ends of the existing piping system may need to be treated or joined in an approved manner, such as with a plain-end repair coupling, the use of an ‘in the air’ grooving tool, etc. Installing valves with threaded connections also can require achieving more deflection distance than in systems with flanged or grooved systems—often using straps or pulleys to move the pipe—to reinsert the fresh pipe ends into the threads.
While we’ve also gone over some basic installation steps, the measuring process is simple. First, try to match the existing control valve size exactly. Otherwise, determine the length of a compatible new valve from the manufacturer’s cut sheet, and measure and cut the pipe as needed to complete the repair.
Be sure to check out QRFS’s selection of control valves—each product page includes the manufacturer’s cut sheet with all the relevant specs. We also carry couplings, fittings, pipe installation tools, and more. If you have questions, contact our support team.
Product recommendations
FAQs
The lay dimension is the length of the valve that fits into the gap in the piping. Manufacturer cut sheets provide this dimension, sometimes identified by a letter such as “C” or “L.”
Take-out is the distance from the valve’s centerline to the end of the pipe. It matters when determining where to cut the pipe or how much pipe is needed during a valve replacement.
Choose a compatible valve with the same pipe diameter and connection type, then confirm its other required performance specifications. Use the manufacturer’s cut sheet to determine its length and measure or cut pipe as needed to accommodate it.
No. An exact replacement grooved or flanged valve may be installed by disconnecting and reconnecting the existing piping, although some pipe movement may be needed for clearance. Threaded valves or replacement valves with different dimensions are more likely to require cutting and installing new pipe.
Some “installation-ready” couplings have internal gasket geometry (a “center leg”) that affects how far the adjoining pipe or valve enters the coupling. Follow the specific coupling manufacturer’s instructions when determining the required pipe lay length.