They offer a compact, simple design that streamlines the process of connecting pipes, valves, and fittings
Well-designed and assembled networks of pipe provide a safe and efficient way to move materials from one location to another. And piping systems as varied as indoor plumbing, petroleum pipelines, and fire sprinkler systems rely on countless leak-free joints to ensure that nothing’s lost along the way. Grooved couplings have made this reliable connection much easier.
In this article, we look at grooved couplings, explaining how they deliver on the characteristics of flanged or welded joints while significantly reducing the labor hours required for installation and maintenance. We also talk briefly about their history, how they compare to other joint types, the installation process, and other important features impacting contractors’ bottom lines.
If you’ve stumbled across this page while searching for grooved pipe couplings and other fittings, you can view our selection here.
Two world wars propelled the development of grooved pipe couplings
World War I saw the introduction of the flamethrower, a weapon designed to flush enemy troops out of trenches with burning liquid. As a lieutenant in the British Army, Ernest Tribe—later the co-founder of the global piping titan Victaulic—trained soldiers in their use. While they could be deadly to their targets, early flamethrowers could also backfire. Fuel tubes often detached, spraying flame at operators and other nearby soldiers.
In response, Tribe developed and later patented what he saw as a reliable way to join pipes together: mechanical couplings. His ambitious invention sought to make leakproof connections between pipes possible without flanges, allowing pipes to be connected end-to-end. A leak-preventing ring, held in place by a metal housing, wrapped around the circumference of two adjacent pipes, preventing liquid from escaping even under pressure.
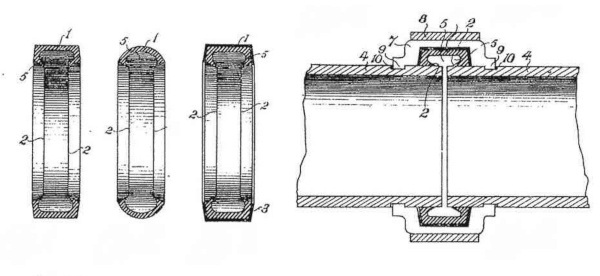
Tribe’s invention improved over the decades to come—particularly with the introduction of synthetic rubber gaskets capable of withstanding exposure to petroleum products. By World War II, couplings manufactured by The Victaulic Company became the go-to device for military engineers laying 4-inch pipes, known as “invasion tubing,” to deliver petroleum to military installations.
Today, mechanical grooved couplings based on Tribe’s design are used in piping systems of all kinds. They’re a popular choice in commercial HVAC and fire protection systems, an increasingly common joining method in commercial plumbing and piping systems, and even an integral part of more than 25 Olympic stadiums.

Grooved couplings, one of many joining options available to pipefitters, provide a seal using indentations and simple components
To hold pipes, fittings, and valves together, grooved couplings rely on indentations—or grooves—near inlets and outlets. In roll-grooved pipes, these indentations are formed using a machine that rotates the end of the pipe while pressing in, leaving a ring-shaped impression in the pipe. As this short video shows, roll grooving displaces the metal, forming a small bulge inside the pipe:
Cut grooving, on the other hand, forms a groove in pipe by removing metal from the outer surface. This grooving method, typically used on Schedule 30 and heavier pipe, reduces the thickness of the pipe wall. Both cut-grooved and roll-grooved pipe can meet manufacturing requirements for grooved and shouldered joints—codified in the standard ANSI/AWWA C-606—without failures or a noticeable loss in pressure.
To join roll- or cut-grooved pipe, grooved couplings use a flexible gasket along with metal housings, nuts, and bolts. The gasket wraps around both pipe ends, preventing liquid from escaping, while the housing, nuts, and bolts secure it in place, creating a seal that can withstand vacuum or pressure conditions.
Grooved couplings aren’t the only option available to pipefitters. Pipes may be bonded together with adhesives, joined by flanges, soldered, welded, or even brazed. Most often, though, grooved couplings are compared with two of these methods: flanging and welding.
In flanging, a series of bolts connect two plates or rings, called flanges, together. These flanges connect to pipes, valves, and fittings through welding or threading, and are largely used where rapid assembly and disassembly are desired. Welding joins components to one another directly using heat—and sometimes pressure and/or metal additives—to form a chemical and mechanical bond.
They can drastically reduce installation times over flanged or welded joining methods
Grooved couplings are often favored over flanged and welded methods of joining pipes because they’re easier and significantly faster to install. One of the most detailed estimates of the labor hours involved in the installation of piping systems comes from the 1996 Seabee Planner’s and Estimator’s Handbook, a guide for planning and estimating construction projects undertaken for the United States Navy.
According to the Handbook, installing copper pipe couplings takes anywhere from 24 minutes for pipe smaller than 1/2″ and more than three hours for a single 4″ pipe coupling. Flanged steel pipes can reduce the time required significantly at larger diameters, ranging from just under a half-hour for 1/2″ pipe and just under one hour for flanges installed to 6″ pipe. Grooved couplings take far less time across the board, installing in about less than six minutes for 1″ pipe, less than 20 minutes for 6″ pipe, and under an hour for 18″ pipe.
In terms of installation time, these estimates suggest that welded pipe can’t begin to compete with grooved couplings—an idea reinforced by Victaulic in their estimates for grooved and welded pipe installations. Using data from the Mechanical Contractors Association of America, Victaulic also found a significant reduction in the labor-hours required for coupling grooved pipes instead of welding pipes together. In an HVAC project using more than 120 couplings, grooved piping systems reduced the overall installation time by nearly two thirds, cutting the total man-hours required from just over 2,000 hours to only 740.
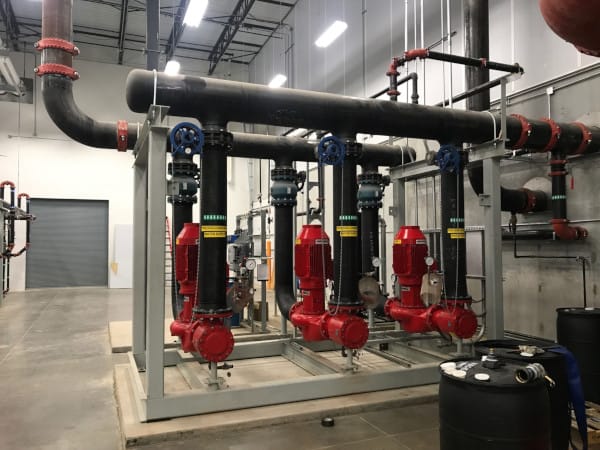
While the exact figures vary, it’s clear that grooved couplings can offer significant benefits to installers. Particularly when labor rates are high, these improved installation speeds can create a sizable reduction in cost for contractors and their customers.
A simple process makes for fast installation of grooved couplings
At the core of these labor savings is a fundamentally simple installation process. With a grooved coupling and only two more items—gasket lubricant and a tool to tighten the nuts—installers can quickly secure these couplings to pipe and fittings. While approaches to installation vary with each manufacturer, a typical installation process might look like this:
- Inspect and clean the pipe ends, ensuring that they’re free of deformations, loose paint, dirt, grease, or other contaminants.
- Ensure that the gasket is correct for the application. Some gaskets are designed only for water service, while others are made for petroleum service—and still others are made from materials specially formulated for more specific applications.
- Apply a thin layer of lubricant to the sealing lips and exterior of the gasket.
- Place the gasket over one end of one pipe, leaving the pipe end exposed.
- Align and abut the two pipes to be joined and center the gasket between the grooves of the pipes to be joined.
- Place the coupling housing in position over the gasket, ensuring that the coupling keys—the long outer edges—are engaged in the grooves.
- Insert bolts and nuts, making them hand-tight.
- Tighten the nuts, alternating frequently to ensure that pressure is evenly distributed over the gasket.
Notably, these couplings can be oriented at any angle around the joint. By rotating the coupling around the pipe, installers can tighten nuts and bolts wherever it’s most convenient. Flanged couplings can’t offer this simplicity: the bolt holes on each flange must align perfectly, restricting the number of possible angles.
Grooved couplings offer additional time savings in inspection, maintenance, and error reduction
Ease of installation may be the single-most-important contributor to grooved couplings’ low installation times. However, they also reduce labor hours in less obvious ways. Many grooved systems can be visually inspected after installation: to confirm that they’re properly tightened, installers can simply look at the bolt pads. If the two halves of the metal housing make contact, the mechanical coupling has been properly secured. This contrasts with welds—which may require x-ray inspections or ultrasonic testing—and flanged joints, which can’t be checked without filling and pressurizing the piping system.
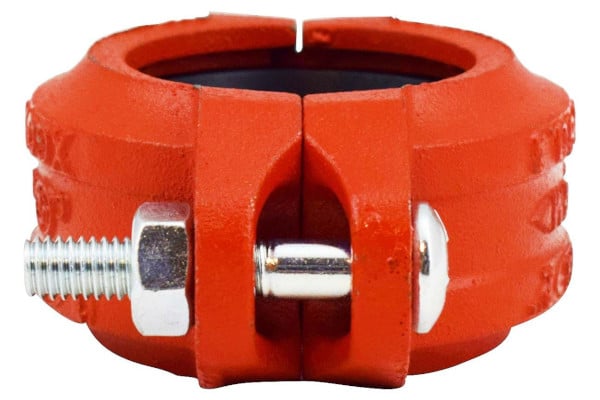
The same mechanism that makes grooved couplings so easy to install also facilitates their quick removal during maintenance operations. To detach a section of pipe for replacement—or remove system components for repair—maintenance technicians only need to drain the system and undo the two bolts holding the housing together.
And while all types of piping joints require proper training and expertise to install, the simplicity of grooved couplings reduces the specialized knowledge needed—and decreases the margin for error with it. The American Society of Civil Engineers’ list of installation pitfalls for flanged joints underscores this point. Misalignment, flawed bolt-tightening practices, errors in bolt selection, and other issues can turn a sound design into flawed execution in flanged piping systems. That compares poorly with most grooved couplings, which are easy to realign and simply won’t fully tighten if they’re not properly seated.
Grooved fittings make rapid installation possible
For any consumer in any industry, most purchases involve choices between cost and quality—but grooved couplings are the rare example of a product that’s easier to use, cheaper to install, and just as effective as the alternatives. If you’re looking for a better way to join pipes, valves, and fittings, take a look at our selection of grooved couplings.
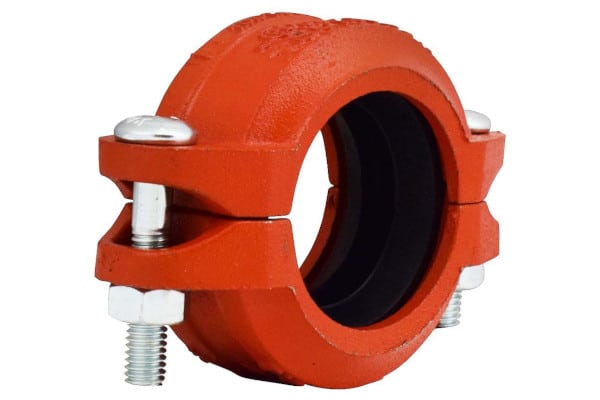
Available in sizes from 1/4″ to 8″, each coupling features a ductile iron body conforming to ASTM A536 Grade 65-42-12 and offers the strength and straight lays typical of welded or flanged joining methods. With a waterproof EPDM rubber seal, these UL-listed and FM-approved grooved couplings are suitable for installation in fire sprinkler systems, standpipe systems, and a wide variety of other piping systems.
Click here to view our selection of grooved pipe fittings, including grooved pipe couplings.
Questions about grooved couplings? Call us at +1 (888) 361-6662 or email support@qrfs.com.
This blog was originally posted at blog.qrfs.com.



Thanks, what an informative post! Everything we need to know are found in this article. We hope you keep posting quality articles.
This blog is really a wonderful blog and I’m very happy to read this blog.
Would like its materials data sheet and technical specifications
Daniel — If you are referring to the grooved couplings that QRFS carries, you can find the data sheets for every product and other relevant documents linked toward the bottom of each product page in the “Data and Resources” section. Thanks!