

The steps and use cases for replacing recessed sprinkler escutcheons
Recessed fire sprinkler escutcheons fill in the gaps in holes that installers cut to expose recessed sprinklers. These parts may get painted, corroded, damaged, loosen, or go missing over time and need to be replaced, either alone or along with the entire sprinkler assembly.
Here’s a step-by-step guide explaining how recessed fire sprinkler head escutcheons come off and go on. Feel free to jump down to a topic:
- The anatomy of a recessed fire sprinkler escutcheon
- Why you’d replace an escutcheon
- Steps for replacing a listed sprinkler escutcheon (non-split)
- Steps for replacing a split-ring sprinkler escutcheon
If you need new or replacement parts, check out QRFS’s wide selection of fire sprinkler escutcheons, including recessed escutcheons from Reliable, Senju, Tyco, Victaulic, and Viking. Need to match a specific sprinkler with its listed escutcheon? Use the QRFS QuickFinder!
The anatomy of a recessed fire sprinkler escutcheon
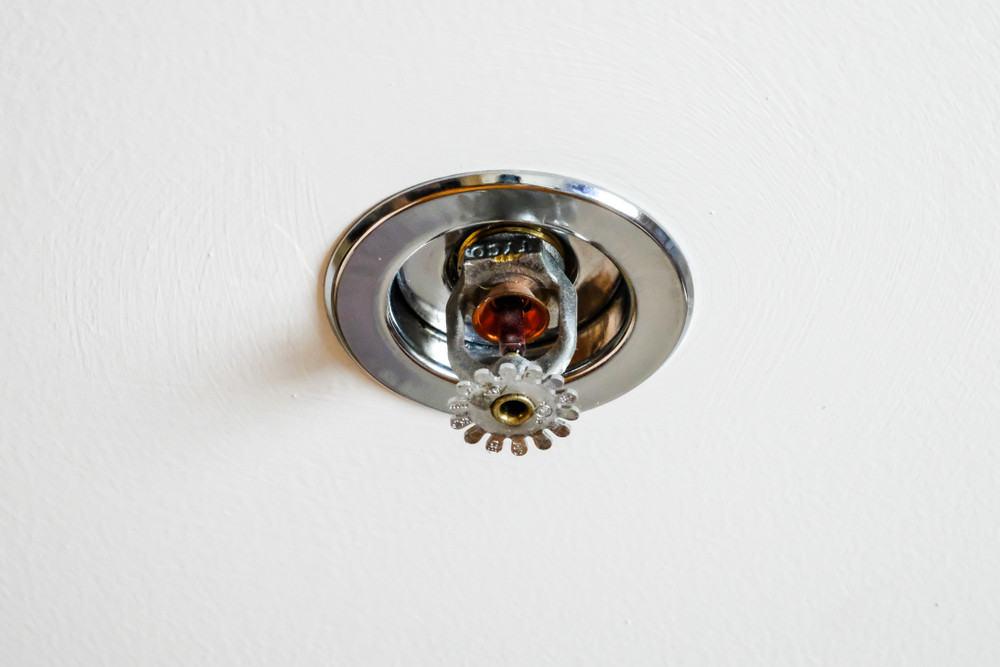
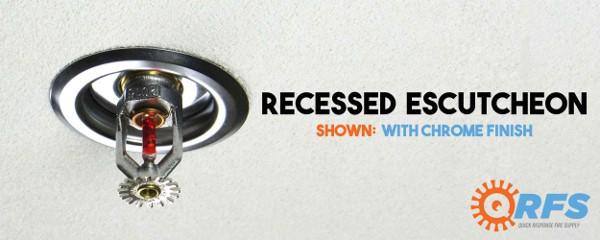
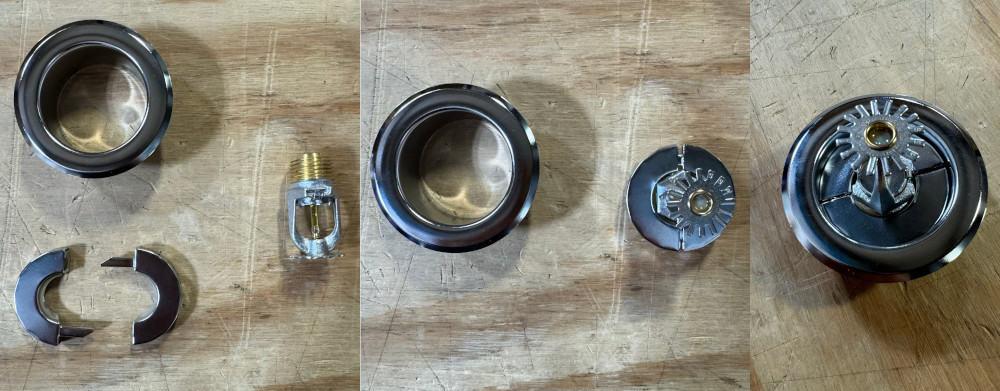
Recessed escutcheons have two parts, which is why they (and some other types) may be referred to as “two-piece escutcheons” or “two-piece escutcheon plates:”
- An outer ring, often called the “skirt,” covers the outer edges of the gap between the sprinkler and the wall or ceiling. Its inner surface sits flush with the ceiling or wall, and it has a projecting cup that slides into the hole surrounding the sprinkler. This cup fits snugly around an inner escutcheon ring (covered next) via ratcheting contours, threads, or simple friction.
- The inner ring, sometimes called the “first-piece plate,” closely surrounds the sprinkler between the sprinkler’s frame and threads, providing a firm fit once the sprinkler screws into its fitting. The holes in most recessed escutcheon inner rings first slide over the threads of the sprinkler before the head is installed—so an installed sprinkler must come off to replace an escutcheon. But there are also “split ring” versions that simply snap off, enabling easier removal and installation (more on these in a bit).
The vertical or horizontal distance between the inner ring and the outer ring is adjustable in most models to account for distance differences between a wall or ceiling and the sprinkler’s position. The adjustment is usually 1/2″ or 3/4″.
Why you’d replace one
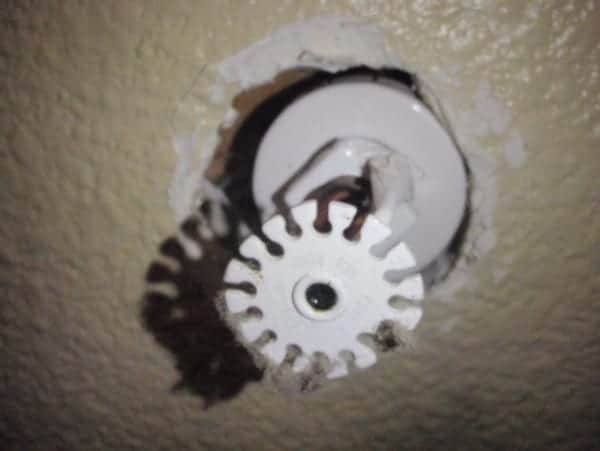
In many cases, people who need to replace an escutcheon also have to replace the entire sprinkler, often because the parts have significant corrosion or aftermarket paint on them. However, sometimes an escutcheon may be damaged, painted, or corroded, or its outer skirt goes MIA.
If a recessed escutcheon is missing, NFPA 25: Standard for the Inspection, Testing, and Maintenance of Water-Based Fire Protection Systems requires replacement:
From the 2023 edition of NFPA 25
5.2.1.1.5 Escutcheons and coverplates for recessed, flush, and concealed sprinklers shall be replaced with their listed escutcheon or coverplate if found missing during the inspection.
Note that the standard specifies replacing a missing escutcheon with a listed escutcheon. This refers to an escutcheon made by the sprinkler manufacturer that’s specifically safety tested as part of the sprinkler assembly. This rule isn’t just important for compliance; it also impacts how easily these parts can be replaced.
All currently listed recessed escutcheons made by sprinkler manufacturers have non-split inner and outer rings—each part is one whole piece of metal. As a result, if you need to replace the inner ring, the sprinkler must be uninstalled so you can slide the ring over the sprinkler’s threads.
So, putting on an entire listed escutcheon is only easily accomplished during the initial system installation. Otherwise, you have to have a pro drain the system and remove the sprinkler head to put one on. This is significant because it may cost over $1,000 (mostly for a contractor’s time) if you need to replace even just one escutcheon. Just replacing the outer ring, which is usually what goes missing, is easy and inexpensive, however.
In contrast, some companies make split-ring escutcheons, where the inner ring comes apart in two pieces. These models simply snap around the bottom of the sprinkler’s base—no system draining is necessary.
However, NFPA rules say replacement recessed escutcheons must be listed, and generic split-ring escutcheons aren’t. Thus, they should only be used if the authority having jurisdiction (AHJ; fire marshal, fire inspector, or insurance company) exercises their discretion to allow them, judging that an unlisted escutcheon won’t impact sprinkler performance.
Let’s cover the installation and replacement steps for both types—listed and split-ring.
Read our previous blog to learn more about NFPA escutcheon rules and their rationale.
Steps for replacing a listed sprinkler escutcheon (non-split)
Given NFPA 25’s recessed escutcheon rules, most full replacements follow this process.
Step 1: A pro shuts off the water to the system and drains it by opening the main drain and any low-point drains.
Since there is a lot of water in a fire sprinkler system and some of it can remain trapped, this process can take a long time unless the pro uses a vacuum (such as Dyne’s Dropmaster™ DM12) to speed up the process. One contractor estimated to QRFS that a vacuum turns a multi-day job into a one-day affair.
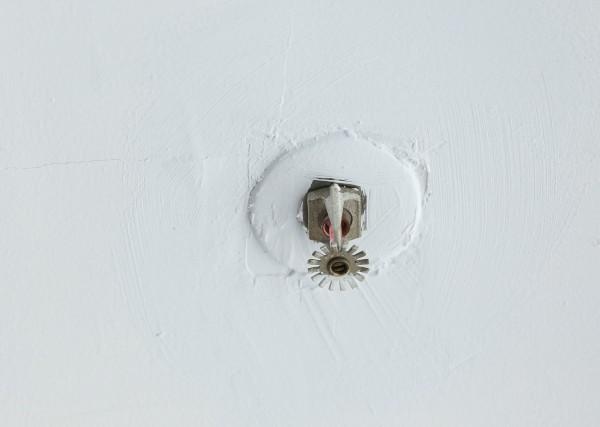
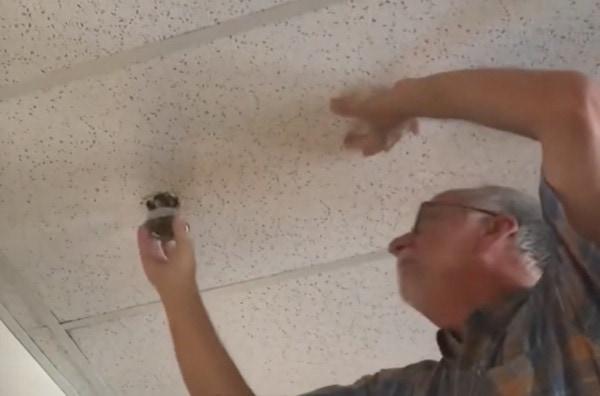
Step 2: A pro pulls off the escutcheon’s outer ring (skirt). A gentle tug and/or twist is all that’s typically needed. The person may lift a drop-ceiling tile, or they work their fingertips or a tool between the outer ring’s rim and a harder, fixed surface.
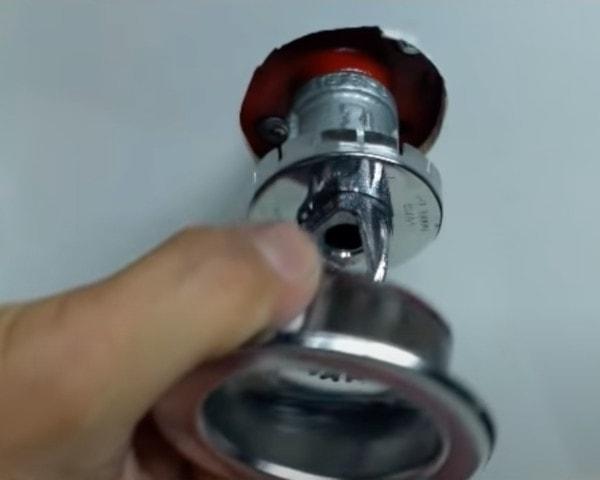
Step 3: A pro removes the sprinkler and inner escutcheon ring. If the recessed sprinkler is installed in a drop ceiling, this is pretty easy. Someone can simply push the tile out of the way and access the sprinkler’s threads to unscrew the head with a wrench. Flexible drywall that pushes inward may also be fairly simple.
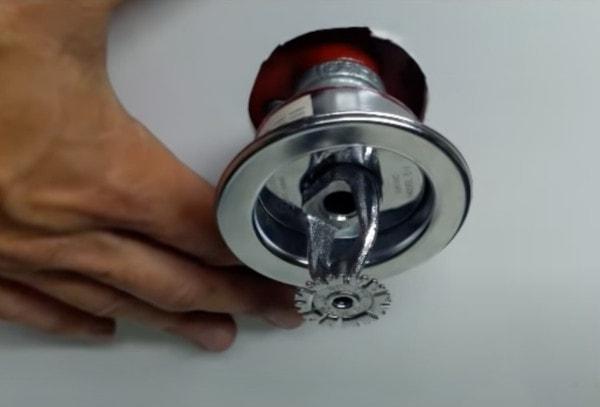
However, harder wall and ceiling surfaces require pulling the sprinkler head out a little to expose where the threads attach to a reducer coupling, or using specialized wrenches for recessed sprinklers.
Since the inner escutcheon ring surrounds the sprinkler at the edge of its threads, it comes off with the sprinkler. If the system has been drained but not vacuumed, some trapped water may come out of the pipe.
Step 5: Putting in a new escutcheon: an installer slides/twists the inner ring (first-piece plate) around the threads of the existing sprinkler or a brand-new one.
Step 4: The installer screws the sprinkler (with the attached inner ring) into the reducing coupling or other fitting type (like a flexible sprinkler drop).
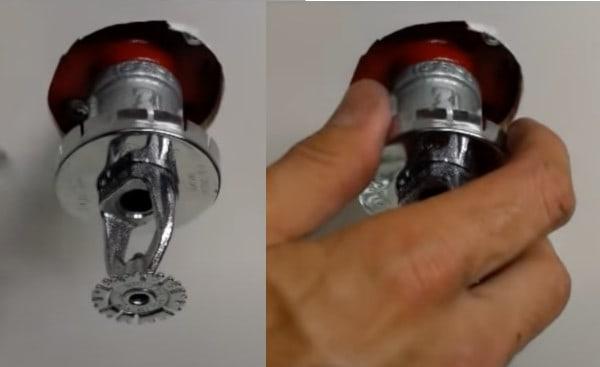
Step 6: The installer completes the installation by pushing the escutcheon’s outer ring into the hole to surround the inner ring. This is where escutcheons may be adjusted—how much can depend on how far the outer ring slides into the assembly.
That’s it. Of course, if you just need to replace a missing outer ring/skirt, which is often the case, someone can just push a new, matching (listed) outer ring into the hole around the still-intact inner ring. No system draining or sprinkler unscrewing is necessary since you don’t have to replace that first-piece plate.
Steps for replacing a split-ring sprinkler escutcheon
The process with generic split-ring recessed escutcheons is much simpler when the entire escutcheon is involved, as no system draining is needed.
Removing a split-ring escutcheon: Pull the outer ring off and unsnap the inner split ring around the sprinkler’s base.
Putting one in: Simply snap the new split inner ring around the very top of the sprinkler’s threads. If the sprinkler is already installed, you’d pull the sprinkler out of the hole or push the surface out of the way a little to access the spot. Then, the installer slides the outer ring/skirt into the hole and adjusts it as necessary.
This process is obviously far easier and doesn’t require an expensive day’s labor to drain the system and replace one or a few escutcheons. However, remember NFPA 25’s prescriptions: missing recessed escutcheons must be replaced with listed models, and sprinkler manufacturers don’t make listed split-ring escutcheons.
Therefore, people should only use split-ring escutcheons if the authority having jurisdiction is okay with it. These items are pretty common, so this is a grey area in fire protection that should be subject to an evaluation of NFPA standards and the discretion of the local AHJ.
Replacing escutcheons is pretty simple—but not always convenient
Most escutcheons are replaced in one of two scenarios:
- The outer ring/skirt goes missing and must be replaced. This is easily done with both listed and unlisted escutcheons.
- The entire sprinkler assembly has to be replaced because of aftermarket paint, corrosion, or another issue. Nevertheless, it’s possible that both parts of a recessed escutcheon will need replacement without a new sprinkler.
“Qualified” regular folks may safely and easily be able to replace a missing or damaged outer ring/skirt—it’s usually just a gentle pull and/or push.
However, putting in complete, listed escutcheons definitely needs a fire protection pro. And if anyone has any uncertainty, they should contact a professional for proper replacement and to ensure the sprinkler doesn’t accidentally activate.
If you need replacement parts, check out QRFS’s wide selection of fire sprinkler escutcheons, including recessed escutcheons from Reliable, Senju, Tyco, Victaulic, and Viking. Need to match a specific sprinkler with its listed escutcheon? Use the QRFS QuickFinder!
Contact us with questions or for help placing an order at support@qrfs.com or 888-361-6662.
This blog was originally posted at blog.qrfs.com.

On my escutcheon it shows np-1 and np-4 as the model number. It adjusts up and down by turning it. I cannot get the outer ring to come off so I can replace ceiling tiles. How do I get the outer ring to disengage from the inner ring to remove for tile replacement?
Michael — We are unsure of the NP-4 escutcheon (to our knowledge, Viking makes NP-1, NP-2, and NP-3). NP-1 is a slip-on escutcheon, and the installation and removal instructions are in this data sheet. Regarding the other escutcheon, please re-verify the label, and you can send us pictures at support@qrfs.com for additional help!