

Putting in FDC caps or plugs is easy—though sizing can be a little confusing. Here are the steps to do it right!
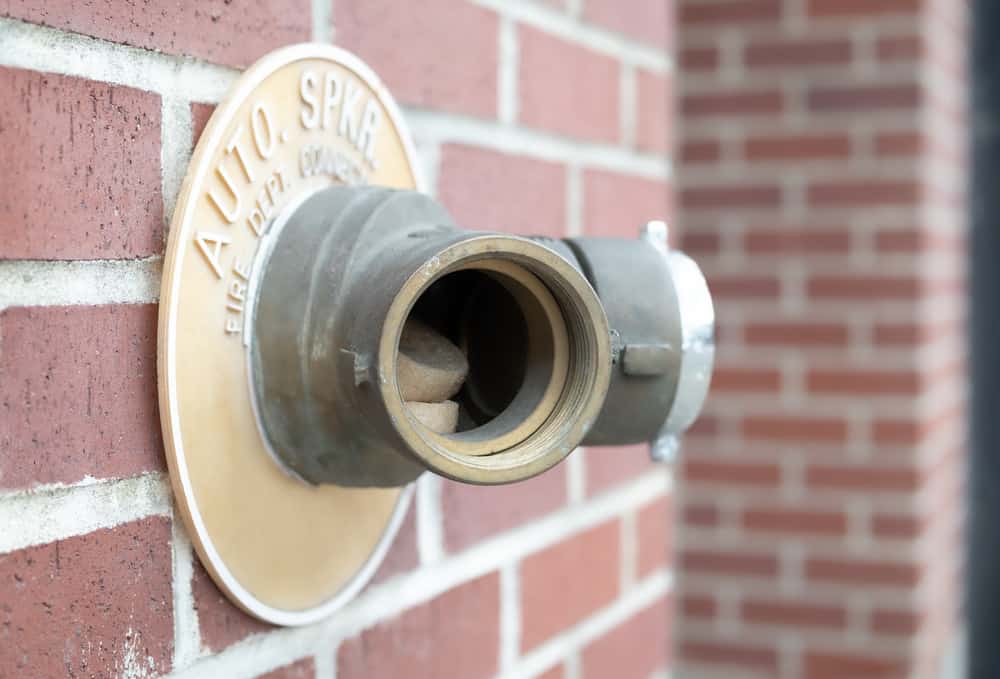
Fire department connections (FDCs) outside buildings allow firefighters to hook up hoses and pump pressurized water into standpipes and sprinkler systems. FDCs need caps or plugs to protect the pipe from debris and objects that can block the flow, and these vital pieces of equipment can go missing and require replacement.
Here are the simple, essential steps to replacing FDC caps and plugs:
- Caps vs. plugs: determine what protective covering you want
- How to figure out the right size and threads
- How to install FDC plugs
- How to install FDC caps
- What about locking FDC plugs?
- How to buy replacement parts
FDC caps vs. plugs: determine what protective covering you want
The most straightforward, code-compliant move in fire protection is usually to replace exactly what your system has or had if something gets damaged or goes missing. However, you may have options when it comes to FDC coverings:
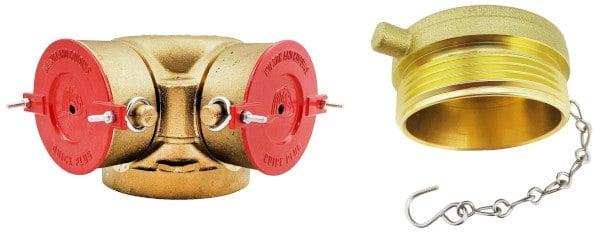
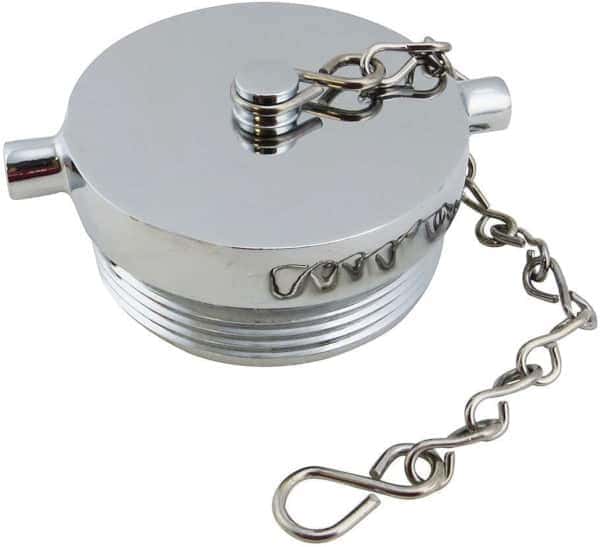
- FDC plugs are made of brass, aluminum, cast iron, or plastic and twist into a fire department connection’s swivel. Though they are tightened with a wrench and require one for removal, these parts can be subject to theft, especially if made of valuable brass—or thieves think the metal is valuable. Plugs often have a chain that hooks onto the FDC body to help avoid losing them, though it’s usually easily removable and doesn’t do much to deter thieves.
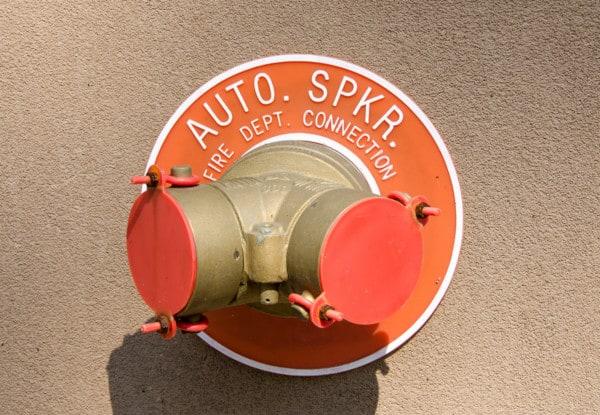
- FDC caps are discs made of plastic or aluminum that sit over the openings. They attach with eyebolts that can tightened by hand. The lower-quality material means caps are less likely to get stolen and are easier to replace if they do go missing. These coverings are called “breakable caps” because firefighters quickly remove them by prying or breaking them off to access the FDC during a fire.
Often, you can choose which covering to use—but not always.
Certain jurisdictions may have rules governing these protective coverings. Some mandate locking “Knox plugs” in theft- and vandalism-prone areas or only allow breakaway caps in secured areas because they are easier to remove.
So, check with your local fire department before choosing a part.
How to figure out the right size and threads
Sizing FDC plugs or caps is where many people run into problems. They come in three standard sizes that reflect fire department connection sizes:
- 2-1/2” is the most common by far
- 3” is for select jurisdictions, like New York City and San Francisco, that use unusual FDC dimensions
- 1-1/2” are typically for smaller residential systems
You can determine what size you need by measuring the FDC, but only if it’s done correctly. If you place a tape or ruler on the outer diameter of the hole (the FDC’s swivel), the number will be too large:
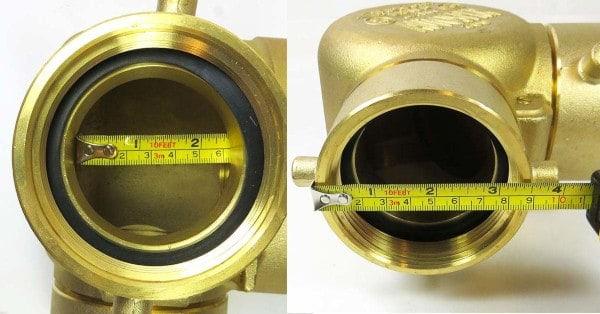
Similar numbers apply if measuring the plug or cap—if all of them haven’t gone missing and you still have one on hand, that is:
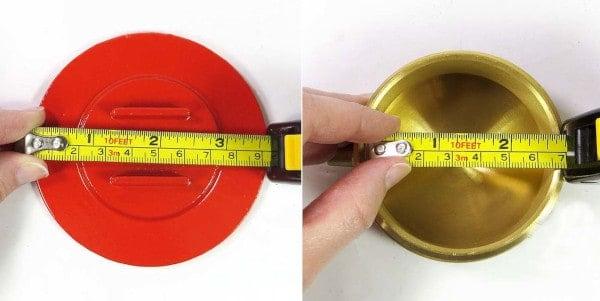
So, you can determine the size of the cap or plug you need by measuring the inner waterway. Getting a ruler or tape inside an installed FDC isn’t possible, but you can eyeball from the outside of the swivel.
You can also verify the number by measuring the outer diameter and doing an approximate conversion:
- An outer swivel diameter of about 3-1/2” should need a 2-1/2” plug or cap
- An outer swivel diameter of over 4” should need a 3” plug or cap
- An outer swivel diameter of about 2-1/2” should need a 1-1/2” plug or cap
Learn more about FDC plug and cap sizing here.
In addition, FDCs and their plugs may involve different thread standards.
Most FDC swivels have National Standard Thread (NST), but some cities, such as New York, Chicago, and others, have unique thread standards. So, check with your local fire department or an ITM professional to verify the standard if you intend to use plugs.
In addition, some FDCs use Storz connections, which require Storz blind caps. These varieties aren’t the focus of this blog, but you can read more about them here.
Once you know the right size, covering type, and thread (for plugs only), you can confidently order the correct part and install it. Here’s how to put in each style:
How to install FDC plugs
This process is about as simple as fire protection maintenance gets:
1. Remove the old plug if it’s still there and needs replacement for whatever reason. If the part was properly installed, you’ll need to loosen it with a spanner wrench before twisting it out by hand.
2. Look inside the hole of an exposed FDC swivel and make sure there is no visible debris. If you spot anything, remove it.
3. Twist the new plug into the hole until it meets firm resistance, and then tighten it with a spanner wrench. If there are any issues here, you likely have the wrong size and/or threads.
4. Hook up an attached chain (if present) into the links on another plug chain (if the FDC has multiple swivels) or the eyelet/grommet on the FDC’s body.
That’s it!
How to install an FDC cap
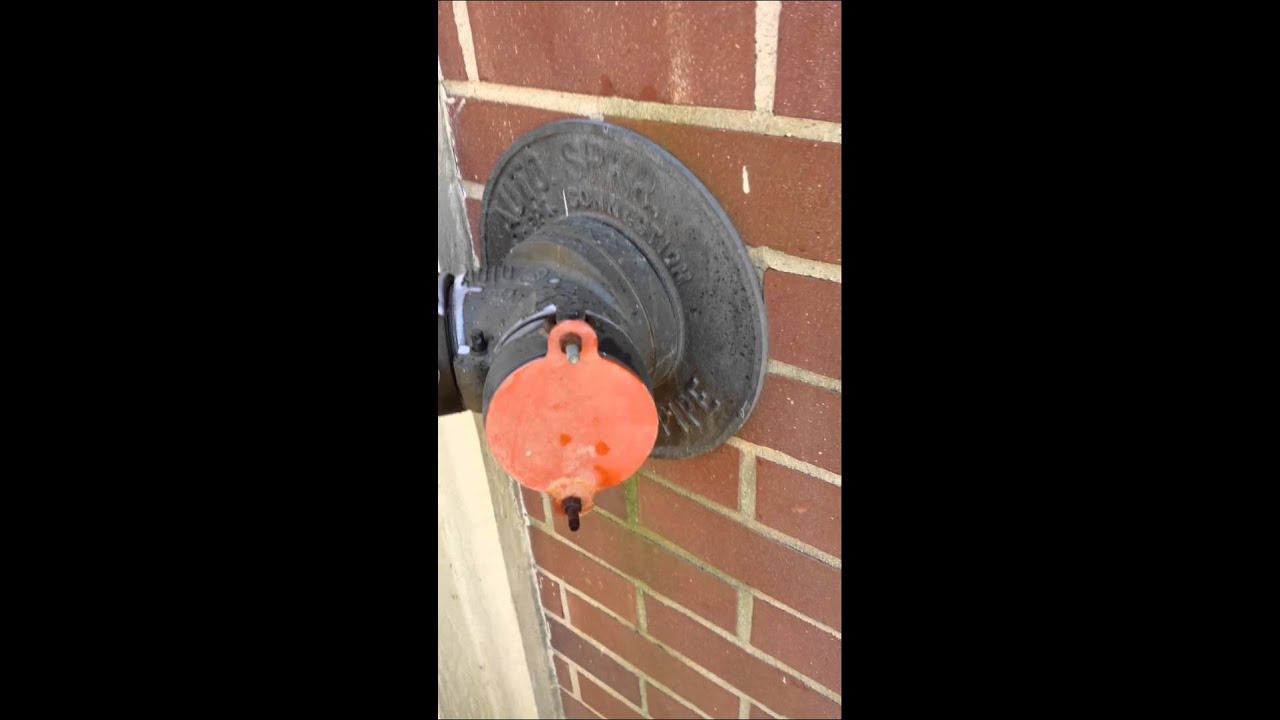
1. If present, remove any FDC plug or FDC cap that needs replacement. Loosen a plug with a spanner wrench before twisting it out by hand. Breakable caps may be pried off with a crowbar or smacked off with a wrench. Here’s a video of the latter method:
2. Look inside the hole of an exposed FDC swivel and make sure there is no visible debris. If you spot anything, remove it.
3. Remove the nuts on the eyebolts and slide the ends through the holes on either side of the cap, with the eyes facing inward toward the FDC. The ends where the nuts attach should stick out on the side of the cap displaying the manufacturer’s name and symbol.
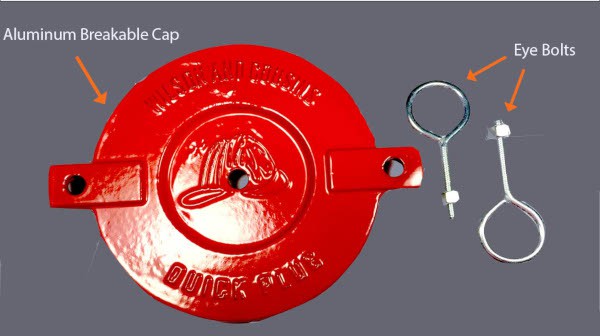
4. Slide the eyes over the lugs projecting from both sides of the FDC.
5. Tighten the bolts by hand until the cap is firmly in place.
That’s it!
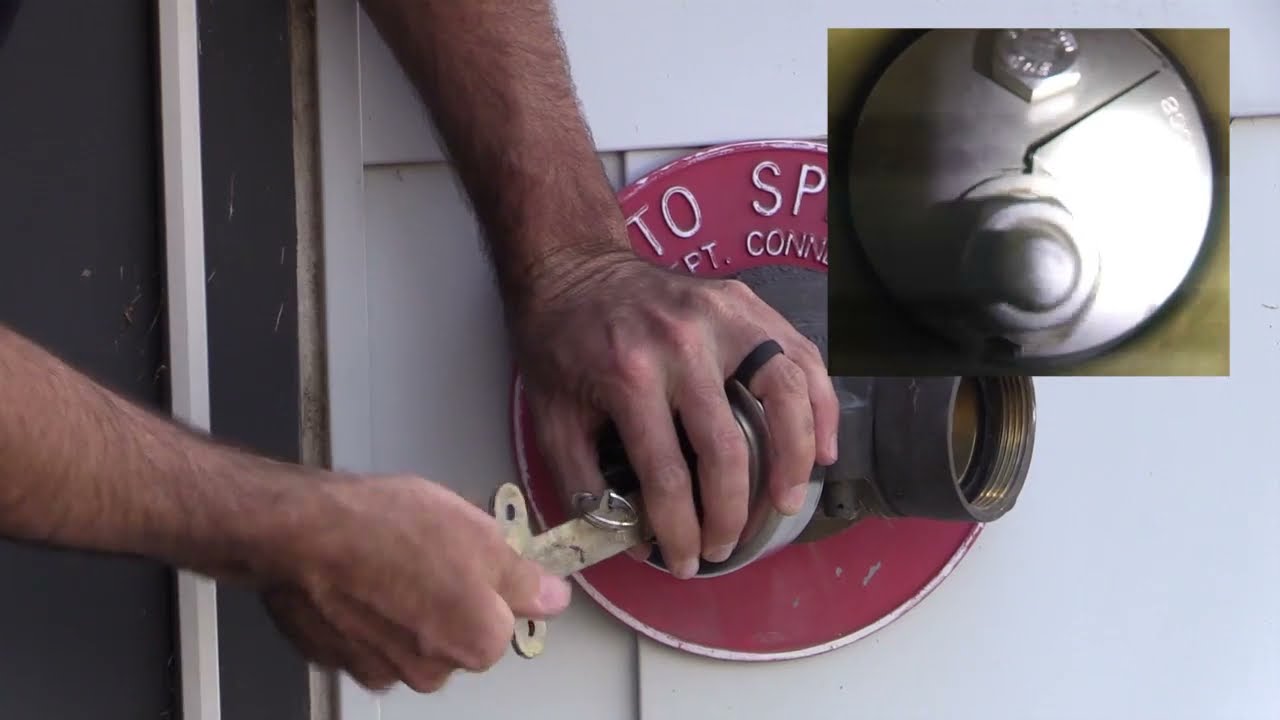
What about locking FDC plugs?
Again, select jurisdictions may require locking FDC plugs (Knox FDC locks) in certain areas, and authorities must at least allow them since firefighters need keys for access. Only authorized personnel have the keys to remove and install locking plugs—such as firefighters during an emergency or fire protection professionals conducting inspection, testing, and maintenance (ITM).
This firefighter training video shows how locked plugs are removed and installed with a key:
Keep your fire department connections protected and working!
Caps and plugs may be simple, but they serve a crucial purpose. Ensure they are in place on the FDCs you are responsible for, using the correct measurements and parts and following the simple replacement steps detailed above.
If you need to buy equipment, check out QRFS’s selection of FDC caps and plugs in 2-1/2”, 3”, and 1-1/2” sizes, including plugs with NST, NYFD, and NPSH threads.
We also carry FDC bodies, replacement snoots and swivels, identification plates, and FDC signs.
Contact us with any questions or for help placing an order at 888-361-6662 or support@qrfs.com.
This blog was originally posted at blog.qrfs.com.
